You just signed up for prmptVAULT. Here's exactly what to do in your first 10 minutes.
This isn't a feature tour or a marketing pitch. It's a step-by-step walkthrough to get you from zero to your first saved generation — with tips on how to get more out of every step. Follow along with the screenshots.
Step 1: Choose Your Asset Type
When you land on the dashboard, you'll see two main asset types: Image and Video.
We’ll start with an image for your first generation. Image generation is faster — most models return results in 2-15 seconds — and it’s the best way to learn how the template system works before jumping into video, where generations take longer and iteration is slower.
You can always switch to video models later. The interface works the same way. But for your first 10 minutes, images are where you'll learn the most, fastest.
Step 2: Pick a Model
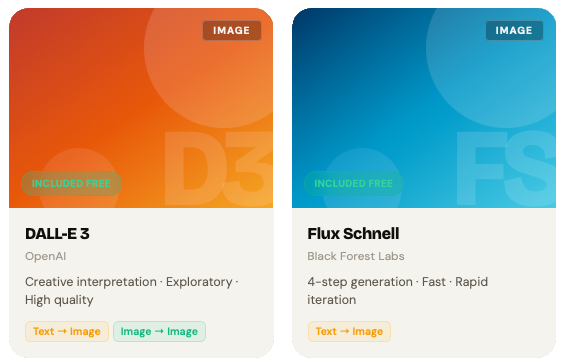
The model picker shows every model available on your tier. Each model card displays its name, what it's best at, and a sample output so you know what to expect before you start.
For your first generation, try DALL-E 3. It’s available on the free tier and is the best model for learning how templates work — it follows complex instructions closely, renders text in images, and handles multi-element scenes better than any other model.
If you’re on Creator or above, here’s a quick guide:
- Flux Schnell — Ultra-fast generation in 2-5 seconds. Great for rapid iteration and testing compositions.
- Flux Pro Ultra — Photorealism. Portraits, product shots, anything that should look like a photograph.
- Recraft V4 Pro — Design and illustration. Clean lines, vector-ready, consistent style.
- Stable Diffusion 3.5 Large — Versatile all-rounder with the most community knowledge behind it.
Don't overthink the model choice right now. You can switch models in seconds, and your prompt carries over. The whole point of prmptVAULT is making model comparison effortless.
Step 2.5: Choose Your Generation Type
After selecting your model, you’ll choose a generation type. For your first run, select Text → Image — you describe what you want and the model creates it from scratch. Other generation types like Image → Image let you transform existing images, but text-to-image is the best place to start.
Step 3: Fill the Template
This is where prmptVAULT is fundamentally different from every other AI tool you've used.
Instead of staring at a blank text box trying to remember what makes a good prompt, you get structured fields — each one calibrated to the specific model you selected. The fields change based on the model because different models respond to different inputs.
Here's what you'll typically see:
Prompt — Your main description. This is the most important field. Be specific and concrete. "A photorealistic portrait of an elderly Japanese fisherman mending nets on a wooden dock at dawn, warm golden light on weathered hands" will always outperform "old man fishing." Put the most important visual elements first — models weight the beginning of your prompt more heavily.
Style — Photo, Cinematic, Digital Art, Oil Paint, Watercolor, Sketch, 3D Render, Anime. This single dropdown dramatically shifts the model's output. Same prompt, different style, completely different result.
Lighting — Golden Hour, Blue Hour, Studio, Neon, Dramatic, Soft, Backlit, Volumetric, Overcast, Night. Lighting is the single biggest factor most people ignore in AI generation.
Mood — Epic, Serene, Mysterious, Melancholic, Whimsical, Dark, Vibrant. You can select multiple. Mood influences color temperature, contrast, and atmosphere.
Aspect Ratio — Match your use case. 16:9 for website headers and YouTube thumbnails. 9:16 for Instagram Stories and TikTok. 1:1 for social posts.
Quality Tags — Highly Detailed, 8K, Sharp Focus, Professional, Award Winning, Intricate. These nudge the model toward higher-fidelity output.
Negative Prompt — What you don't want in the image. Start with: "blurry, low quality, distorted, watermark, text, extra limbs, duplicate, deformed."
Not every field is required. For your first generation, just fill in the Prompt, pick a Style, and choose your Aspect Ratio. You can add more fields as you get comfortable.
Pro tip: See the AI Assist button next to the prompt field? Hit it. It analyzes what you've typed and suggests improvements specifically tuned to the model you're using. Available on Creator tier and above.
Step 4: Generate
Hit Generate. Watch it happen.
DALL-E 3: 5-10 seconds. Flux Pro Ultra: 10-20 seconds. Video models: 30-120 seconds depending on duration and complexity.
The output appears in the generation panel as soon as it's ready.
Step 5: Review Your Output
Your generation is already saved to your vault automatically. You don't need to right-click save, download, or screenshot anything. It's there.
From the output panel, you can:
Download the full-resolution file — PNG, JPEG, or WebP depending on the model and your settings.
Generate again with identical settings — useful for getting variations on a composition you like.
Tweak and regenerate — change one field (swap the lighting, try a different style) and generate again. Small adjustments compound. Three rounds of single-field tweaks almost always produce better results than three completely different prompts.
Switch models — keep your prompt and settings, switch to a different model, and see how it interprets the same input. This is the most powerful learning tool in prmptVAULT. Same prompt, different model, wildly different output. Do this at least once during your first session.
Step 6: Check Your Library
Navigate to your asset library. Every generation you've ever created lives here — organized chronologically, with the model name, prompt, and settings attached to each one.
Your recently used models appear at the top of the model picker, so your workflow gets faster the more you use it. After a few sessions, your most-used models are always one click away.
On Studio tier and above, you can export collections from your library — useful for sharing results with clients or teammates.
What to Try Next
You've got the basics. Here's how to level up in the next 10 minutes:
Run the same prompt through 3 different models. Compare the results side by side. You’ll immediately see why model selection matters as much as the prompt itself. Try DALL-E 3, Flux Schnell, and Recraft V4 Pro for maximum variety.
Try a video model. Select Pika or LTX-2.3 for the fastest video results. The template adapts — you'll see new fields like Duration and Camera Movement appear. Start with a 3-5 second generation to keep wait times short.
Explore the Style picker. Take one prompt and run it as Photo, then Oil Paint, then Anime. The transformation is dramatic and teaches you how much that single field controls.
Use negative prompts aggressively. Add "blurry, distorted, low quality, text, watermark" as your baseline negative prompt on every generation. It's a free quality boost that costs nothing.
Try AI Assist. Type a rough prompt idea, hit AI Assist, and see how it enhances your input for the specific model. It's particularly useful when you're working with a model for the first time.
The vault is open. Start generating.
Start generating at prmptvault.ai.